Build guide: the best high-end gaming PC
https://iamg4mer.blogspot.com/2017/01/build-guide-best-high-end-gaming-pc.html

Not everybody can afford a high-end gaming PC. That’s partly because PC parts generally aren’t cheap, but it can also be the result of differing ideas on what “high-end” actually means. PC Gamer’s high-end PC build guide has aimed for a price tier of $2,000 (£1500) in the past, and that’s what I attempted to stick to here.
A $700 or $800 PC is head and shoulders above any console you can buy. Sure, you can go cheaper with a PC, but racing to the bottom isn’t what PC gaming is about. And once you start dipping below $600 it’s hard to see the advantage of the PC anyway. Console makers get their parts in bulk on the cheap, and it’s hard to fight against that kind of scale with retail parts. At the next tier of $1,300, you can see improved frame rates and quality settings due to the graphics cards that become available. And at this tier of $2,000 (give or take $100 or so), we try to push a good bit further with the highest-end graphics cards within reason.
Since our last update, the cost of a few parts have decreased slightly, so we decided to use the savings to beef up the SSD. To also help offset the cost, we pulled the optical drive. It was already an optional addition, and the added SSD storage renders the reading of physical discs even more obsolete.

Components
We based this build upon prices we could find at the time we updated this article, but prices do change. You'll find real-time prices for the parts in the above list.


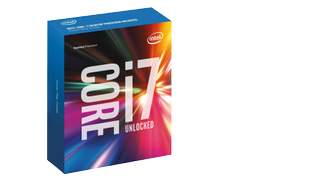
CPU: Intel Core i7-6700K
Last time this guide was touched, it was noted that the next build would switch to a Haswell-E CPU. While I felt the pressure to conform to this, I held back and stuck to the i7-6700K. There’s a few reasons why.
First of all, the 6700K’s prices were floating high for quite some time. At one point, the 6700K actually cost more than the i7-5820K that would have been the logical Haswell-E part to go with. Had those prices stayed, I would have gone with the Haswell-E part (along with an X99 motherboard that it would require), but prices have fallen and seem to have stabilized, making the 6700K the better choice (for now).
Another reason is the fact I stuck with a single GPU. While there’s enough juice from the 850W PSU to add in another GTX 980 Ti, the base build is around a single GPU. For that, the extra PCIe lanes that the 5820K provides would go unused here. The i7-6700K has 16 lanes on board, which is enough for a single graphics card at PCIex16. If another card would be added in, dropping to PCIex8 isn’t all that big of a hit, considering the extra oopfh the second GPU would provide.
On top of all that, the i7-6700K offers a significantly higher stock clock speed over the i7-5820K. (I’ve seen overclocks with AIO water coolers of up to 4.8GHz, though that level tends to get touchy when it comes to stability in heavy number crunching tasks.) Granted the 6700K has two fewer cores, but this is a gaming rig, not a workstation. If someone wants to get serious about video encoding or doing some heavy-duty work in the Adobe Creative Suite however, the Haswell-E system will be the better buy.
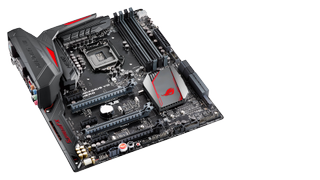
Motherboard: Asus Maximus VIII Hero
There are a lot of Z170 motherboards to choose from right now, and the Maximus VIII Hero comfortably in the midrange area of premium boards.
Motherboards in this class usually cost anywhere from $225 to $260, and this particular board’s price fell from when this guide was last updated. That’s a win for us, and an incentive to keep this board around. The price was also an incentive for us to stay with Z170 instead of going for X99. This is a mid-tier Z170 motherboard, but for its price, you’ll only find “entry-level” X99 boards that go for about $250. (To be fair, many of those boards, like the MSI X99A SLI Plus are really great.)
The Hero is built with overclocking and gaming in mind, but lacks somee of the more top-shelf features that its bigger brothers the Maximus VIII Formula and the Maximus VIII Extreme. To be fair though, those boards run for $400 and $485 respectively. With those prices in mind, we’ll take the Hero with a smile.
The Maximus VIII has USB 3.1 ports, three x16 PCIe 3.0 slots, and a x4 PCIe M.2 slot to accommodate the Samsung 950 Pro. It uses Intel networking and has convenient on-board buttons. It’s a standard ATX board, so it will fit in almost any tower case.
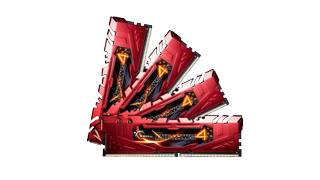
Memory: G.Skill Ripjaws 4 Series DDR4 2400 (32GB)
The last time this was written, the build called for a kit of DDR4-2666. In the interest of slimming the price a bit, I dropped the speed down to 2400MHz. As long as you have enough memory and a decent speed, memory really isn’t much of a bottleneck when it comes to gaming. Going from 2400MHz to 2666MHz might offer one or two extra FPS, which is hardly worth noting. The quantity of your RAM will often have more impact than the clock speed of the RAM. And I made sure to pad this build with quantity--to the tune of 32GB.
RAM clocks more if you’re going for extreme overclocking, and only starts to make sense when building systems that creep towards $3,00 or $4,000.
Coming from Maximum PC, using 16GB of RAM is considered mid-range for most of those builds. Most modern gaming systems should really have 8GB at bare minimum, 16GB for good measure, and 32GB if you want to be care-free. Want to open 20 tabs in Chrome and play The Division in windowed mode? You can do it with 32GB of RAM.
It also helps that RAM is fairly cheap, and has been getting cheaper. And since I was willing to go with 2400MHz, I was able to get more for the money. These sticks are from G.Skills Ripjaws 4 Series, which have timings that are quite good. When buying RAM, it’s usually a face-off between G.Skill’s Ripjaws 4 or V series, and Corsair’s Vengeance LPX series. At these clock speeds, I look for CAS latency of 15 or less and a decent price.
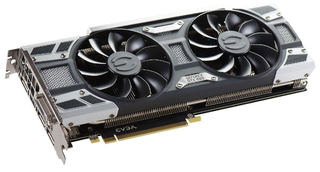
Graphics card: EVGA GeForce GTX 1080 FTW DT GAMING ACX 3.0
Now that the GTX 1080 has officially launched with the GTX 1080 Founders Edition, the GTX 980 Ti has been knocked off its throne—along with the rest of the Maxwell line.
At $700, the Founders Edition of this card offers a new blower design and represents the "reference" model of the GTX 1080. The downside to this is that the Founders Edition card is about $100 more than the GTX 1080 "non-Founders" MSRP of $600.
So we went with an EVGA GeForce GTX 1080 FTW DT Gaming ACX 3.0 graphics card, which is priced at $650. The EVGA is cheaper than a Founders Edition card, but offers the same performance. It doesn't use a blower-cooler fan like a Founders Edition, but its open air cooler is perfectly suitable for a single-GPU gaming system. Those who plan to SLI will want to examine cards that have blower-fans, as they exhaust the hot air outside of the case. For open-air fans, there's no need for concern if your case is well cooled and has good airflow.

Power supply: EVGA Supernova 850 watt G2 80 Plus Gold
When it comes to power supplies, EVGA’s G2 series are a favorite of mine. All of them sport an 80 Plus Gold Rating, and a fully modular design to help keep cable mess at a minimum. But if there’s one thing that sets the G2 apart from its peers, it the 10-year warranty that it comes with. Lots of power supplies offer warranties of five years, but knowing that your PSU should continue to function with normal use for a decade is the kind of peace of mind I like to have. And I’m saying this as someone who’s had their PSU burn out and fail on them in the middle of a WoW raid.
The 850W maximum load is plenty for this rig, and leaves plenty of room for a second GPU should the need arise. I usually like to leave 50-100W of headroom above the estimated maximum load of the system, and this PSU offers more than that for this configuration.
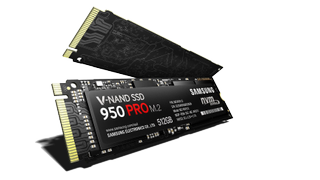
Primary storage: Samsung 950 Pro SSD (256GB)
SSDs have been more expensive than HDDs since, well, forever. The advent of non-volatile memory express (NVMe) is yet another step above the good ol’ SATA SSD, both in performance and price. With sequential read speeds of 2,200MB/s (that’s megabytes per second, mind you), you won’t be spending a whole lot of time on loading screens.
The 950 offers blistering speeds for our operating system, with enough room to spare for games and programs we want to launch especially fast.
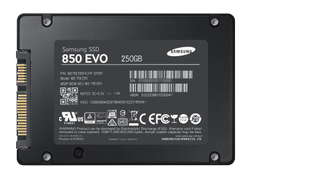
Secondary storage: Samsung 850 EVO (1TB)
Samsung’s 850 EVO is the go-to SSD I recommend for most builds. The 850’s speeds are fast, and performance is more consistent than most of its competitors. The biggest thing holding back the 850 EVO is the fact it’s riding on the SATA bus, but it still offers impressive sequential reads of up to 540MB/s.
Since the 950 we're using for our OS is only 256GB, we wanted a larger drive for our secondary one. Our previous build featured a 500GB 850 EVO, with the option for an additional 2TB WD Black. This time around, we split the difference and opted for a 1TB 850 EVO, which should be enough storage for most of your games without the need for a less-zippy spinning-disk HDD.

CPU cooler: Corsair H100i v2
Corsair’s Hydro series of CPU coolers are a good solid base when it comes to all-in-one closed-loop solutions. You can find better options, but when it comes to price and simplicity, Corsair’s offerings just get the job done. My current go-tos when it comes to Corsair are the H80i v2 and H100i v2.
Thee biggest difference between the H80i v2 and the H100i v2 are their form factors. If mounted and employed correctly, their cooling abilities are nearly evenly matched. While the H80i is about $20 cheaper than the H100i, I went with the H100i here because it is a more natural fit when top-mounted in the Cooler Master MasterCase Pro 5.